


 Your new post is loading...


LCD1602-I2C isn’t working.
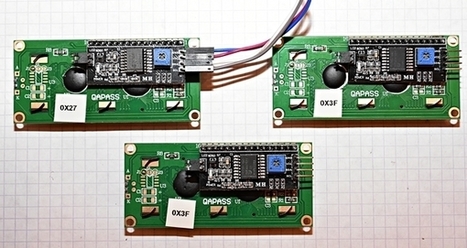
Well, I made some searches on the internet and I found the right answer on a forum about this error, which says that one should scan the I2C Address of the device and replace the “lcd.init();” by “lcd.begin (0x3F,16,2);” whereby “0x3F” is the I2C Address of my LCD1602/I2C module. I scanned to find out the I2C Addess with this sketch, please check here:
https://playground.arduino.cc/Main/I2cScanner
Learn more / En savoir plus / Mehr erfahren:
https://www.scoop.it/t/21st-century-learning-and-teaching/?&tag=ARDUINO
https://www.scoop.it/t/21st-century-learning-and-teaching/?&tag=I2C