Your new post is loading...
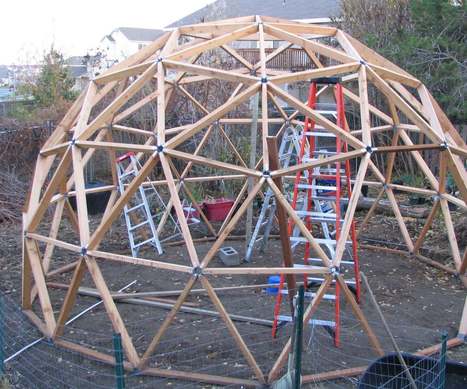
In 2006 I started work on a geodesic dome greenhouse. At that time there were fewer resources on the internet for doing this, and I had to derive the formulas for some of the math myself using sites and resources that are no longer available on web. These days I would recommend a calculator like http://acidome.ru to find the exact measurements you need. Nonetheless, all of my numbers are here so that you can see the process.
This table is a really fun and simple build. Easy, but quite a bit of work. It requires accuracy and patience, but with those two traits, ANY intermediate and most beginner woodworkers can build this.
If you want the MOST in-depth instructions, check out the build video included in this guide. Everything will make a lot more sense after you do, though I'll do my best to fully explain every step along the way.
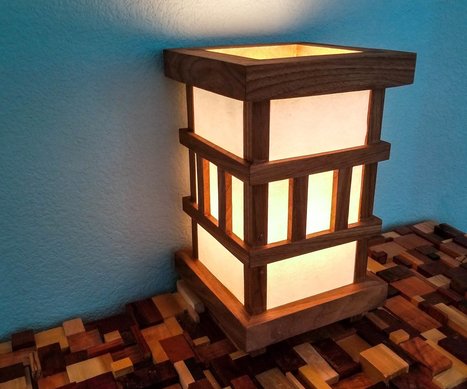
I had some walnut scraps laying around that I wanted to use for something instead of throwing away, but couldn't think of a use for them. I remembered seeing a similar lamp to what I have made when I visited Little Tokyo in LA and liked the symmetrical, minimalist look of it. This seemed like a perfect weekend project to use my remaining scraps, as it is mostly open space filled in with a paper wall. While this lamp is relatively simple and not all too hard to make, it still looks nice on a side table or in the corner of a room. This is a nice weekend project, where the most complicated part of it is keeping the clamping and glue-up square.
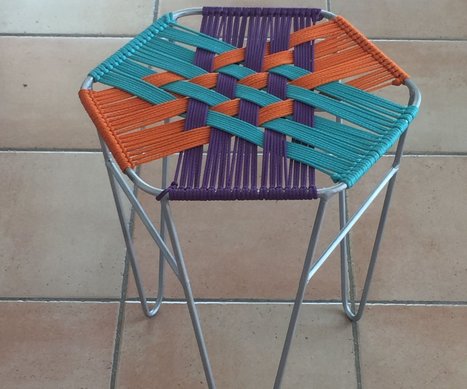
I propose this instructable on a stool, with a metallic frame made with welded steel rods, and a woven sitting made with colored polyester yarns. The pattern in the center is supposed to represent 3D cubes... but it is not so obvious to see (I acknowledge I made some mistakes)
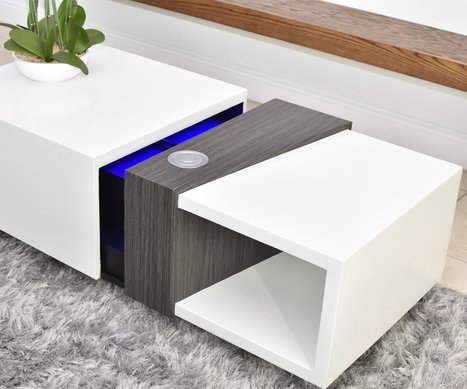
For a while now I wanted to create a piece of furniture that moves. I didn’t have a preference for the level of complexity I just wanted to create something. I am a huge fan of having a simple space and keeping things I don’t use everyday hidden. When I got my hands on this 4K Projector the light bulb in my head when off! This was my moment to do something cool and hopefully different!
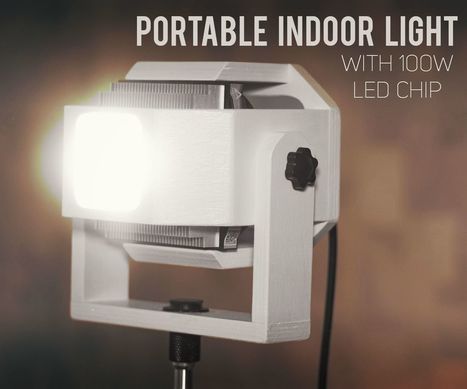
In this instructable / video I will show you how I made portable indoor light with 100W LED chip which is powered with 19V 90W power supply from an old laptop.
My daughter recently started collecting succulents and Tillandsias (air plants). Honestly, I had never heard of air plants but as the name implies, they grow without the need for soil. They can be purchased at your local nursery or garden center and online.
Anyway, she wanted a way to display them. Online, you will find various options for containers with the most common selection being glass terrariums. I wanted to make something a little different. Also, it's an excuse to use my scrap wood. If you are not a woodworker, I've also include STEP and STL files (last step) for those that would prefer to 3D print the holders.
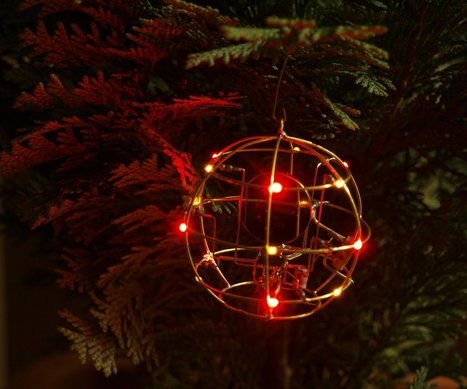
Original glowing ornament for your Xmas tree. It's made from brass rods wired by a freeform method and contains 18 glowing LEDs.
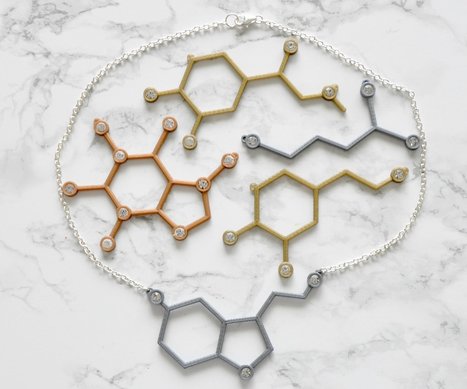
I was looking at some projects on the site the other day and saw a laser cut Serotonin necklace and thought it would be fun to make a 3D printed version that also has rhinestones! I fiddled with the design until It came out just the way I wanted it and this is the results! I thought Serotonin was a good molecule for this project but decided to branch out and so far I have also made Dopamine, Adrenaline, GABA, and Caffeine. I'll talk a little about each molecule in Step 2.
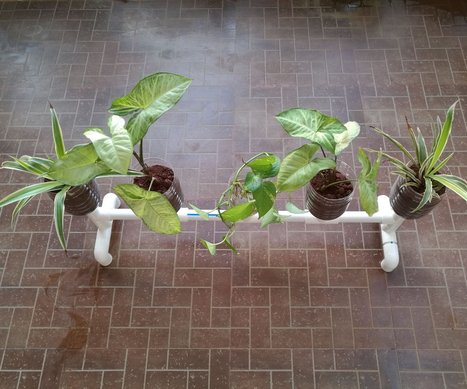
In this instructable, we will make plastic bottle planters with self watering stand made out of PVC pipes.
Here, we are going to make a 5 planter stand, but you can easily modify the design to hold more number of planters.
So, let's move onto the next step for gathering tools and materials used to build this project.
In this instructable we'll show you how to make a light and sound interface that can be used to play "Simon Says" and as a MIDI interface. Both modes will be played with your feet.
We use pasteurized eggs for dishes that require uncooked eggs. Homemade mayonnaise, salad dressing and eggnog!
Raising backyard chickens means that egg cleanliness can vary. It often does based around the season or the cleanliness of the coop. During wet weather the chicken feet track more mud around the eggs.
Here is the simple way we pasteurize our eggs.
The goal is to get their core temp to 140 degrees for 3min.
Instructables is having an Electronic Tips and Tricks Contest now, so I thought I would share some of mine regarding the use of SMD parts and techniques on standard issue, single sided, good ole perfboard. Many of us more thifty types often find the parts to our creations out of old, broken, cheap electronics from all sorts of places. Of course in the modern age its pretty rare to see many, or any though hole components.
|
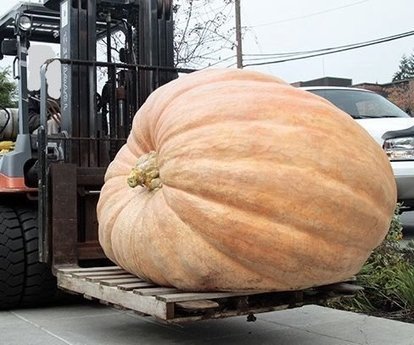
Getting out in the garden can be so much fun! Choosing your plants, planning out your plot, and harvesting the fruits of your labors are all reasons that many gardeners love this spring to fall activity. But, even the most enjoyable hobbies needs a BIGGER challenge now and again. If you love thinking big, putting in time in the dirt, and reaping HUGE rewards for your efforts, then growing a GIANT PUMPKIN might be your next gardening adventure!
This Instructable will guide you through everything you need to know to grow the biggest pumpkin of your life. But, BEWARE, growing giants is an addictive hobby and once you get a taste of success you will only want to grow bigger and bigger. YOU HAVE BEEN WARNED!!! Have fun, and grow 'em BIG!
This desk lamp is inspired from the Jumo "Bolide" folding lamp originally made in bakelite. It was designed in the 40's.
A re-edition of this lamp can be seen on the New Jumo site. My version is inspired from this design but is not intended to be a replica. I made it from lime tree (tilia wood) for the base and shade with a "Shou Sugi Ban (Yakisugi)" (Japanese burned wood technique) for a nice deep black finish.
The arms are made from steel and some walnut wood.
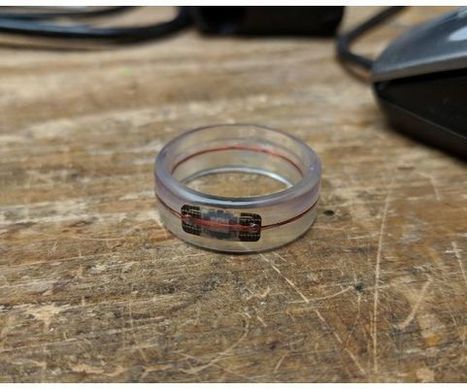
The idea behind this project is that if you have an RFID credit card, you can tell your bank that you need a replacement card, then once you have that second card, you can dissolve it in acetone, take out the RFID chip, solder a new antenna to it, glue that assembly to an inner frame, then put that assembly in a mold made from the full-size ring, pour resin around it, then have a ring that will let you pay at any establishment that accepts RFID credit cards (you'll be able to use your ring at pretty much anywhere that accepts google/apple pay) without you needing to take out your wallet.
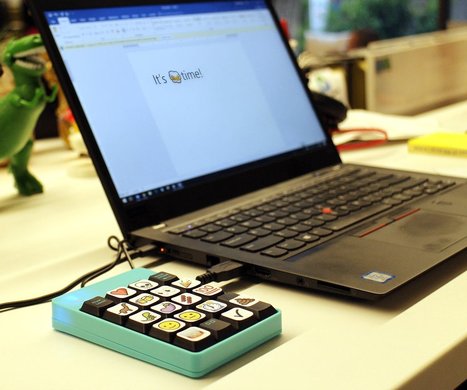
Sometimes words aren't enough when composing correspondence on your computer and you need something a little more colorful to convey your message, enter the emoji!
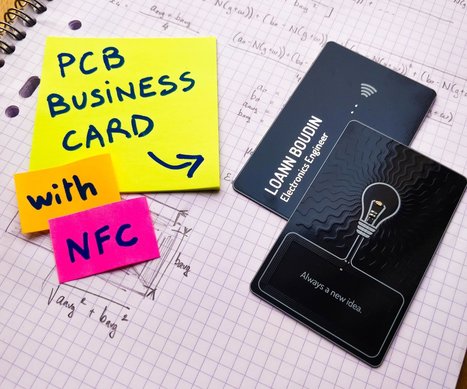
Arriving at the end of my studies, I recently had to look for a six-month internship in the field of electronics engineering. To make an impression and maximize my chances of being recruited in the company of my dreams, I had the idea to make my own business card. I wanted to make something unique, useful and able to demonstrate my electronic circuit design skills to whom I will hand it.
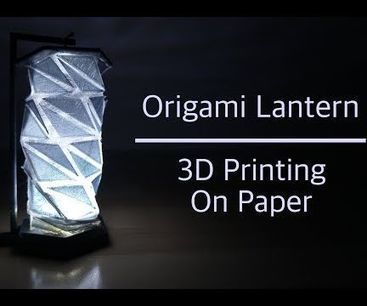
This project started as an idea I had from a movie I watched last summer; Between the Folds. It's about origami, and towards the end a professor from MIT, Erik Demaine mentioned that you give memory to paper when you fold it. That got me thinking, what if you retain the memory of the sections of paper that isn't folded?
This is a great project to have kids decorate with stickers, Gelly or paint pens (I like Posca acrylic pens but sharpie pens could work), patterned paper (scrap booking or wrapping paper), pom-poms, sequins, whatever the heart desires!
You could cover it with felt and add cute felt candies.
You -- do you!
The cutting is definitely an adult’s job.
People with severe locomotor disabilities like those caused by cerebral palsy often have complex communication needs. They may be required to use boards with the alphabet or commonly used words printed on them to aid in communication. However, many may not be able to effectively gesture at their chosen symbols due to limitations in their motor abilities.
A laser pointer can be used by those with a somewhat fine neck control to gesture at symbols or objects of their choosing. The following instructable will teach you to make a simple, cheap laser pointer that can be clipped onto the bridge of a spectacle.
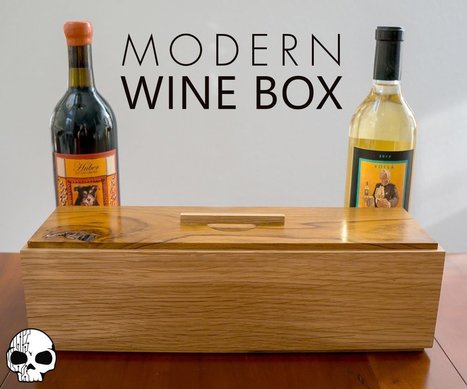
When we got married, at our wedding we had what's called a wine box ceremony. It's a modern ritual where, during your wedding you seal up a bottle of wine inside a box along with love letters written to one another. Five years later on your anniversary you open the box, drink the wine, and read the letters! We just had our five year anniversary and we really enjoyed opening our first box, drinking the wine together, and reliving the memories of our wedding. As the bottle neared empty and our creativity soared, we thought it would be a really fun project to build a new wine box together for our next five years of adventures.
This project all started with a clock. More precisely, a Word Clock controlled by an Arduino. While soldering and troubleshooting, I decided on the housing of the clock to be within a group of hexagon shelves. While building the shelves, I thought a lot about how they would mount to the wall and I decided on the large herringbone panel. A few extra details and weeks later, I finally finished this beautiful piece. It all wasn't planned from the beginning, but I seem to do some of my best work over time while I let ideas evolve. In this Instructable I'll walk you through the steps I took, share some tips, and hopefully inspire some of you to make this awesome thing!
It started as an idea to build a head-tracking plasma gun, "like in the Predator movie"...
Almost a year later, it became a full body size, interactive Predator Halloween costume featuring props, head-tracking plasma gun, laser sights, original sounds and everything else the Predator could do (except being invisible).
Building this costume has been an incredible journey, and if you are willing to embark on this project please allocate a lot of time. It took me almost a year (working on weekends mostly) to design and build it. It covers a wide range of skills, and thus have been an amazing mix of cutting, sawing, spray- and brush-painting, gluing, sewing, soldering, programming, sound-editing, video-editing, 3d designing, and 3d printing.
Eyes on the prize, Violet. Eyes on the prize!
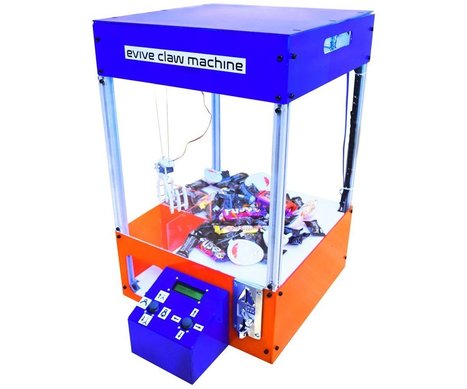
Get ready for a candy-grabbing face-off with your family and friends with this classic arcade game - the candy claw machine! But this time, it’s going to be a bit different - first, it’s going to be at your home, and second, you’re going to make it yourself! Oh yeah! Here’s bringing to you the evergreen Claw Machine with a touch of DIY! You can now easily make your own DIY candy claw machine and challenge your mates to a candy battle. Whoever gets the most candies wins the challenge. So, what are you waiting for? Jump right in before all the candies are gone!
|